
Tools
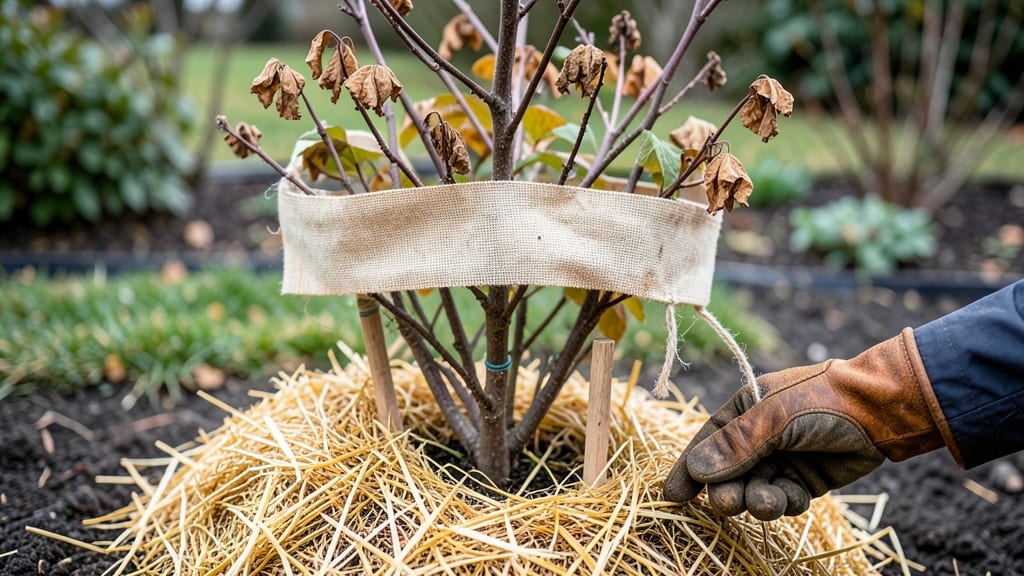
Your garden’s winter protection is the key to saving plants from ❄️ frostbite and ensuring a strong spring revival.
Freezing temperatures can devastate your garden—but with the right winter protection strategies, you can shield delicate plants from frost, wind, and snow damage while ensuring a thriving spring comeback.
Think of it like layering a cozy sweater for your plants: mulch acts as the base, row covers as the mid-layer, and frost blankets as the outer shield. Each barrier works together to trap warmth and block harsh winds.
In this guide, I’ll walk you through five science-backed layers, when to apply them, and how to avoid common mistakes that leave plants vulnerable. Whether you’re in a chilly USDA Zone 6a or a colder region, these tips will keep your garden safe until spring.
5 Layered barriers for winter garden protection against freezing temps
Winter can be brutal on your garden, especially when temperatures plummet below freezing. Without proper protection, delicate plants like tender perennials, young shrubs, and annuals can suffer irreversible damage. The key to survival lies in creating a multi-layered defense system that traps heat, blocks wind, and insulates roots.
Think of it like dressing your plants in a thermal blanket—each layer adds another barrier against the cold.
Science shows that combining physical barriers (like row covers) with insulation materials (such as straw or burlap) can raise soil temperatures by 5-10°F during frost events. This small difference can mean the difference between a thriving spring garden and a winter casualty.
Below, I’ll break down the five essential layers you need, ranked from the foundation up, to create an impenetrable shield against freezing temps.
| Layer | Material Examples | Purpose | Best For | Temperature Protection |
|---|---|---|---|---|
| 1. Foundation Layer | Straw, wood chips, shredded leaves | Insulates soil, prevents freeze-thaw cycles | Perennials, shrubs, trees | ❄️ 10-15°F warmer |
| 2. Root Insulation | Cardboard, burlap, landscape fabric | Blocks wind, retains heat at soil level | Vegetable beds, container plants | ❄️ 5-8°F warmer |
| 3. Mid-Layer Cover | Frost blankets, row covers, bubble wrap | Traps radiant heat, reduces evaporation | Tender annuals, herbs, seedlings | ❄️ 3-5°F warmer |
| 4. Windbreak Barrier | Burlap sacks, corrugated plastic, snow fences | Reduces wind chill, prevents desiccation | Exposed plants, young trees | ❄️ 2-4°F warmer |
| 5. Top Layer Shield | Cloches, plastic domes, heavy blankets | Creates microclimate, protects foliage | Delicate perennials, tropical plants | ❄️ 1-3°F warmer |
The first layer is your foundation, and it starts with the soil. A thick layer of organic mulch—such as straw or shredded leaves—acts as an insulator, preventing the ground from freezing solid.
For example, 4-6 inches of straw can keep soil temperatures 10-15°F warmer than exposed earth. This is especially critical for perennial roots and young trees, which need consistent warmth to survive dormancy.
Next, add a root insulation layer using materials like cardboard or burlap. These act as a windbreak and block cold air from penetrating the soil. For container plants, wrap pots in bubble wrap or foam insulation to create an extra barrier.
This layer is non-negotiable for vegetable beds and potted herbs, where roots are most vulnerable to temperature swings.
For the third layer, introduce a mid-layer cover like frost blankets or row covers. These lightweight fabrics trap radiant heat and reduce moisture loss. A frost blanket can raise temperatures by 3-5°F, making it ideal for tender annuals like basil or seedlings that can’t handle even light frosts.
Secure the edges with bricks or soil to prevent wind from lifting it away.
Wind is a silent killer in winter gardens, and the fourth layer focuses on windbreak barriers. Use burlap sacks or corrugated plastic to create a physical shield around exposed plants. Even a snow fence can work wonders in reducing wind chill.
This layer is particularly important for young trees or shrubs planted in open areas where wind can strip away protective moisture from leaves.
The final layer is your top shield, designed to protect foliage from direct frost damage. Cloches or plastic domes create a microclimate around individual plants, trapping warmth like a greenhouse. For larger plants, drape heavy blankets over them, securing them with stakes.
This layer is essential for delicate perennials like hostas or ferns, which can suffer leaf burn even at 28°F.
Pro tip: Combine layers strategically. For example, use mulch + burlap + frost blanket for perennial beds, while cloches + straw work best for container-grown plants.
The goal is to mimic nature’s insulation—just like how snow blankets the ground, your layered approach creates a protective cocoon for your garden.
Remember, the key to success is timing. Apply the foundation layer before the first frost, but add the top layers only when
When and how to apply each winter protection layer for maximum effectiveness
Timing your winter protection layers is just as critical as choosing the right materials. Applying mulch or covers too early can trap moisture and encourage rot, while waiting too long risks frost damage.
For most USDA Zone 6a gardens, start preparing in late September—before the first frost—but apply final layers only after temperatures drop below 32°F (0°C).
The key is to layer protection strategically, starting with the most permanent barriers first. For example, install permanent structures like cold frames or hoop houses in early fall, then add removable layers like frost blankets or straw mulch once frost hits. This approach ensures your plants stay protected without overheating.
- Layer 1 (Base): Apply 3-4 inches of mulch (straw or shredded leaves) after first frost to insulate soil.
- Layer 2 (Mid): Wrap tender perennials in burlap or frost cloth when temps drop below 25°F (-4°C).
- Layer 3 (Top): Add snow cover (if heavy snowfall) or plastic sheeting over hoop houses for extreme cold.
- Timing Tip: Check local frost dates—apply final layers 2-3 days before expected frost.
For annuals and young plants, use lightweight row covers or cloches before the first frost to create a microclimate. These work best for plants like basil, tomatoes, or peppers, which can’t survive freezing temps.
Secure covers tightly to prevent wind damage, and remove them during mild winter days to avoid overheating.
Shrubs and woody perennials need a different approach. Focus on root protection by mounding soil or mulch around the base, then loosely wrap the crown with burlap or cardboard to shield from freeze-thaw cycles. Avoid plastic wraps, which can trap moisture and cause rot.
In Zone 6a, late winter (February) is the time to check your protection layers. Remove any synthetic covers if temperatures rise above 40°F (4°C) to prevent mold growth. For organic mulch, wait until spring to refresh it—this prevents soil compaction and maintains moisture.
Remember, the goal is to mimic natural snow cover while allowing airflow. Overprotecting can suffocate plants, so monitor conditions and adjust layers as needed. With the right timing and materials, your garden will bounce back stronger in spring! 🌱