
Fertilization
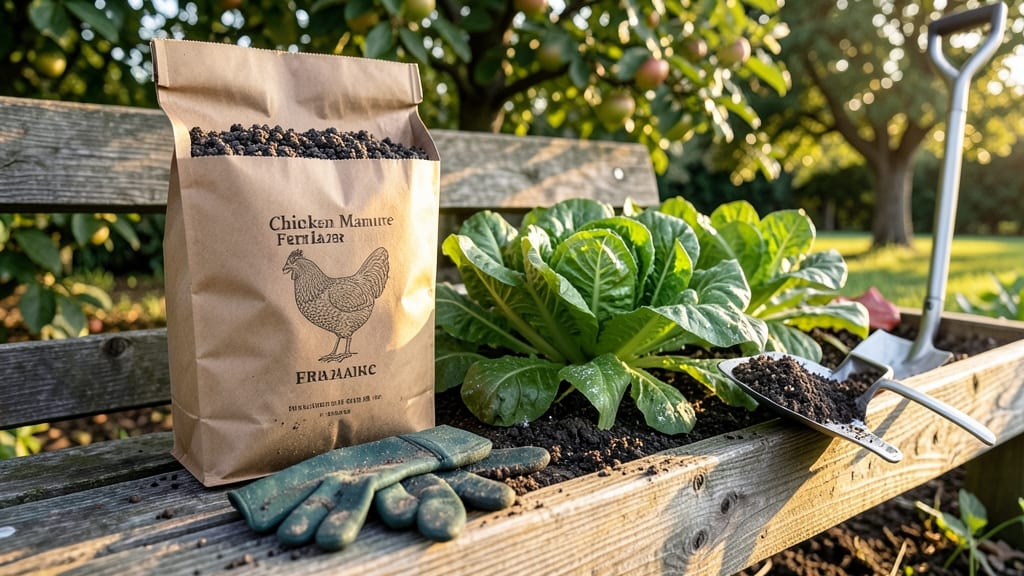
Using chicken fertilizer in your garden transforms nutrient-poor soil into a powerhouse for stronger 🌱 growth and bigger harvests.
Struggling with nutrient-poor soil? Chicken manure isn’t just a farmer’s secret weapon—it’s one of the most powerful organic fertilizers for gardens, packed with nitrogen, phosphorus, and potassium to supercharge plant growth.
But here’s the catch: raw chicken manure can burn plants if applied incorrectly. That’s why knowing how to compost it properly, when to use it, and which crops benefit most makes all the difference.
In this guide, I’ll walk you through the best ways to use chicken fertilizer—from composting tips to application timing—so you can grow thriving vegetables, vibrant flowers, and lush lawns without the guesswork.

How to properly apply chicken manure fertilizer for maximum garden benefits
Chicken manure is a gardener’s dream come true—it’s packed with nitrogen, phosphorus, and potassium to fuel plant growth, improve soil structure, and boost microbial activity. But using it wrong can burn your plants or spread pathogens.
The key? Aging, composting, and proper application turn this powerful fertilizer into a garden superfood. Whether you’re growing tomatoes, flowers, or herbs, mastering chicken manure will transform your soil in just one season.
Before diving in, know this: Fresh chicken manure is too strong for most plants. Its high ammonia content can scorch roots and leaves, while raw manure may harbor harmful bacteria like E. coli or salmonella. That’s why composting or aging for at least 3–6 months is non-negotiable.
Once properly prepared, though, chicken manure works wonders for leafy greens, fruiting plants, and even lawns. Let’s break it down step by step to get it right the first time.
Source or Prepare Fresh Manure
Collect dry, clean chicken manure from a trusted source (avoid wet or soiled bedding). If sourcing raw, mix it with straw or wood shavings to absorb moisture and reduce odor. For immediate use, compost it—this is the safest method for most gardeners.
Compost for 3–6 Months
Pile manure in a compost bin or heap, turning it every 2–4 weeks to speed up decomposition. Aim for a hot compost pile (130–160°F) to kill pathogens. Test readiness by checking for dark, crumbly texture and earthy smell—no ammonia odor should remain.
Apply to Soil 4–6 Weeks Before Planting
Work 1–2 inches of aged manure into the top 6–12 inches of soil in garden beds or raised beds. For container gardens, mix 10–20% aged manure into potting soil. Avoid direct contact with plant stems to prevent burns.
Use as a Top Dressing Mid-Season
After plants are established, sprinkle a thin layer (¼ inch) of aged manure around the base, keeping it 2–3 inches away from stems. Water deeply to activate nutrients. Repeat every 6–8 weeks for flowering plants or 4–6 weeks for heavy feeders like corn or squash.
Safety First: Wear Gloves and Mask
Always wear gloves and a dust mask when handling raw or composted manure. Wash hands thoroughly after contact. Keep manure away from water sources to prevent runoff, which can contaminate groundwater.
Timing is everything when it comes to chicken manure. For spring planting, apply composted manure in early spring (4–6 weeks before sowing) to give nutrients time to integrate into the soil.
If you’re planting fall crops like kale or carrots, add a light top dressing in early summer to avoid overstimulating growth before cooler weather. And remember: Less is more—overapplying can lead to nutrient imbalances or salt buildup in the soil.
Not all plants respond the same way to chicken manure. Leafy greens like lettuce or spinach thrive with its nitrogen boost, while root vegetables (carrots, beets) benefit from phosphorus-rich compost.
For flowers and fruiting plants (tomatoes, peppers), a balanced approach—mixing with compost or worm castings—prevents excessive leaf growth at the expense of fruit production. Always test your soil before applying to avoid overdoing it.
One of my favorite tricks? Mix aged chicken manure with compost tea for a nutrient-packed foliar spray. Strain well to avoid clogging sprayers, then apply in the early morning to give plants a quick nutrient boost.
This works especially well for container plants or stressed seedlings that need a gentle pick-me-up. Just dilute the tea to half-strength to avoid burning tender leaves.
If you’re new to chicken manure, start small. Try a 5-gallon bucket of aged manure in one garden bed and monitor plant responses. Keep a garden journal to track growth, soil changes, and any signs of stress.
Over time, you’ll learn the perfect balance for your specific soil type and climate. And don’t forget: Patience pays off—the best results come from consistent, thoughtful application rather than quick fixes.
Ready to transform your garden? Grab some chicken manure, follow these steps, and watch your plants grow stronger, healthier, and more resilient. Your soil—and your plants—will thank you for it! 🌱
Chicken manure vs. other organic fertilizers: which works best for your plants?
Choosing the right organic fertilizer can feel overwhelming, especially when you're staring at bags labeled chicken manure, compost, or worm castings. Each brings unique benefits, but your plant's needs—and your garden's goals—should guide your choice.
Chicken manure, for example, delivers a powerful nitrogen punch, but it's not always the best fit for every situation.
Let's break down how chicken manure stacks up against other organic fertilizers like compost, worm castings, and cow manure. We'll compare nutrient profiles, ideal crops, and even cost-effectiveness so you can make an informed decision for your garden's health.
Chicken manure's high nitrogen content makes it ideal for leafy greens like lettuce or spinach, but its fast nutrient release can burn plants if not composted first.
For root vegetables like carrots or potatoes, cow manure is a safer bet due to its slower nutrient release and lower risk of burning tender roots.
Worm castings, on the other hand, are a gentle all-rounder. They improve soil structure and provide a steady supply of nutrients, making them perfect for container gardens or seedlings that need a gentle boost. While more expensive, their slow-release properties make them a favorite for delicate plants like orchids or herbs.
If you're looking for a budget-friendly option that improves soil health over time, compost is hard to beat. It’s versatile, safe for all plants, and can be made at home from kitchen scraps and yard waste.
For fast-growing crops like tomatoes or peppers, a mix of chicken manure and compost often gives the best results.
Ultimately, the best fertilizer depends on your plants' needs and your garden's goals. For quick nutrient delivery, chicken manure is unbeatable, but for long-term soil health, compost or cow manure may be the way to go.
Always remember to compost manure before applying it directly to avoid burning your plants.